
But first, I'd like to tell you a story. I'm sure you know what a viewfinder looks like, and you've probably seen artists use them in art school. They are this little cardboard cut out that allows you to see only a small part of the landscape or picture you want to draw. Most viewfinders also have a grid that allows you to reproduce proportions exactly.
When I was learning to paint with watercolors, a lifetime ago, we used a grid to reproduce the horse that was our model. I did a fantastic horse. Well, of course! I thought I was not drawing it, because I was using the grid.
"That's not drawing, that's cheating!" So that was the last of my self-directed attempts, since it wasn't really drawing, you know.
Well, guess what!!! It IS drawing!!! As I discovered 2 years ago. Yep, it took me that long.
Here's the story.
My great-grand uncle is Paul Chabas, who painted September Morning, displayed below.
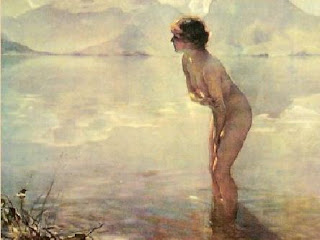 If you'd like to know more about the story and the scandal that surrounded this painting, it's available here: http://www.bullworks.net/ffg/sptmrn/sptmrn.html
By a strange twist of fate, my step-sister came by a lot of Paul Chabas drawings and study photos. And what did she find as well?
Something particularly rare and precious: this photographic study of a young lady posing for the painting. How cool is that! (No, we don't know who she is.)
 But then, look at what else we have:
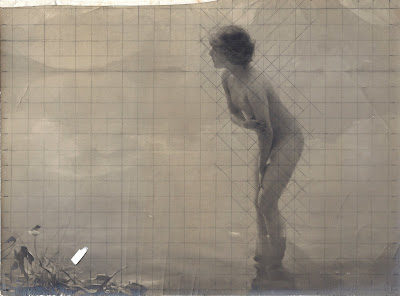
A grid on a photographed study of the painting!!!!
He made a small study, then used a grid to enlarge it to its final size (which is something quite large). And the man belongs to the Academie Francaise, which is the most prestigious art institution in France!!!! So I guess it's ok to use a viewfinder and a grid, to reproduce the world!
So today we are going to build a viewfinder. For the grid, it's easier to use a sheet of transparency paper, something reasonably light, because some of the exercises will require that you balance it on top of your fingers for a while.
You can set the transparency or plexiglass ion a piece of cardboard and glue it to give it rigidity.
You will want to make several at once as you'll be finding this device very useful. Here's the reason why. You will be drawing some sketch marks ON the transparency, and erase them. So if you have several, you'll have a few spares once the first one gets all smeared.
For the grid's lines, you want to use a permanent marker. Draw a box on your page that measures 6.5 by 8.
Divide it in half vertically and horizontally.
Next, we will use the viewfinder to frame your drawings to make them easier to transfer and more accurate.


How cool to actually see the grid marks!
ReplyDeleteWhat a treasure you and your sis found in those pictures! Awesome!
ReplyDelete